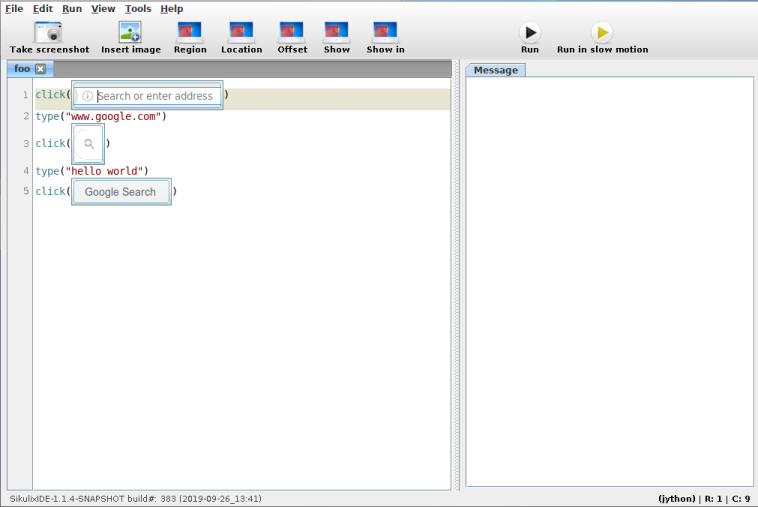
Sikuli is a tool for automating repetitive tasks.
To automate a program, it makes use of screenshots and image recognition to decide where to click and type [automation_methods]. As you can see above, Sikuli uses Python for its script's language (plus rendered image). But under the hood, its implemented in Java and runs Jython. Since nothing Sikuli uses really needs Java, we'll try to implement some GUI automation in pure Python.
We want to write a library so that calling something like
click("path/to/image.png")
will find a copy of image.png on the screen and click it.
There are three components to this kind of GUI automation:
This post assumes we're running on Linux, but similar tools for other platforms and even OS agnostic libraries do exist.
We'll just use an existing program to take screenshots as a user. In this case mtpaint because its lightweight, but any screenshot program will do.
mtpaint -s
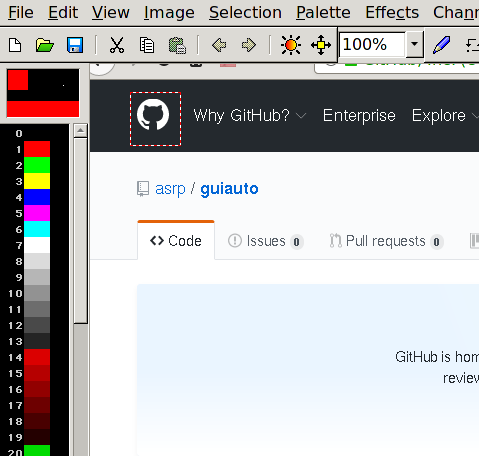
Then we can select a rectangle, hit the Delete key and save.
Our program also needs to take screenshots of the entire screen to find image.png on it. We'll do this with the Xlib library.
from Xlib import display, X

def screencap(x, y, w, h):
    root = display.Display().screen().root
    raw = root.get_image(x, y, w, h, X.ZPixmap, 0xffffffff)
    return numpy.fromstring(raw.data, dtype=numpy.uint8).reshape(h, w, 4)[:, :, :3]
we can get the current screen's width and height with
screen = display.Display().screen()
width, height = screen.width_in_pixels, screen.height_in_pixels
Sikuli uses a computer vision library, OpenCV, to find image.png within a screenshot. We'll do the same
import cv2

def find_best(needle, haystack):
    match = cv2.matchTemplate(haystack, needle, cv2.TM_CCOEFF_NORMED)
    min_val, max_val, min_loc, max_loc = cv2.minMaxLoc(match)
    return max_loc, max_val
Here, needle is image.png represented as a width by height by 3 (colours). numpy array. haystack is the screenshot represented in the same way.
find_best returns a position and a confidence value (between 0 and 1).
To move the mouse and click, we'll use Xlib's xtest extension.
from Xlib import display, X
from Xlib.ext.xtest import fake_input

def mouse_move(x, y):
    disp = display.Display()
    root = disp.screen().root
    root.warp_pointer(x, y)
    disp.sync()

def mouse_click(button=1):
    disp = display.Display()
    fake_input(disp, X.ButtonPress, button)
    disp.sync()
    fake_input(disp, X.ButtonRelease, button)
    disp.sync()
We now have all ingredients needed and are ready to implement click("path/to/image.png").
import numpy

def find_on_screen(image):
    needle = cv2.imread(image)
    screen = display.Display().screen()
    width, height = screen.width_in_pixels, screen.height_in_pixels
    haystack = numpy.array(screencap(0, 0, width, height))
    return needle.shape[1::-1], find_best(needle, haystack)

def click(image, similarity=0.7):
    shape, (pos, confidence) = find_on_screen(image)
    if confidence > similarity:
        center = [int(p + s/2) for p, s in zip(pos, shape)]
        mouse_move(*center)
        mouse_click()
We used cv2.imread to load the image from its path and if OpenCV finds a copy of the image on screen with high enough confidence (here 70% confidence by default) then click on the middle of the image.
The combined source code is here.
We've got a usable starting point that we can improve a bit. Or you could stop reading here and make your own changes.
The first thing we might notice is that full screen captures takes a while to complete.
We can use a C function that returns an array of size width times height times 3 (colours) from pixels on the screen. We'll first make it a flat array and reshape it later [c_screenshot].
//Compile hint: gcc -shared -O3 -lX11 -fPIC -Wl,-soname,prtscn -o prtscn.so prt
#include <X11/X.h>
#include <X11/Xlib.h>

void getScreen(const int, const int, const int, const int, unsigned char *);
void getScreen(const int xx, const int yy, const int w, const int h, unsigned char * output)
{
   Display *display = XOpenDisplay(NULL);
   Window root = DefaultRootWindow(display);

   XImage *image = XGetImage(display,root, xx, yy, w, h, AllPlanes, ZPixmap);

   int x, y;
   int ii = 0;
   for (y = 0; y < h; y++) {
      for (x = 0; x < w; x++) {
         unsigned long pixel = XGetPixel(image, x, y);
         output[ii++] = (pixel & image->red_mask) >> 16;
         output[ii++] = (pixel & image->green_mask) >> 8;
         output[ii++] = (pixel & image->blue_mask);
      }
   }
   XDestroyImage(image);
   XDestroyWindow(display, root);
   XCloseDisplay(display);
}
Compiling this will give us a screencap.so shared library file that we can call from Python.
import ctypes
import numpy

lib_filename = '/abspath/to/screencap.so'
c_screencap = ctypes.CDLL(lib_filename)
c_screencap.getScreen.argtypes = []

def screencap(x, y, w, h):
    objsize = w * h * 3

    # result = c_screencap.getScreen(x, y, w, h)
    result = (ctypes.c_ubyte * objsize)()
    c_screencap.getScreen(x, y, w, h, result)

    return numpy.array(result, numpy.uint8).reshape([h, w, 3])
We can use xtest to generate keyboard events. However, we have to pass a keycode which is inconvenient. Given a display.Display, we can lookup the keycode from a key's name (as a string) like so:
from Xlib import XK

def string_to_keycode(d, key):
    return d.keysym_to_keycode(XK.string_to_keysym(key))
and we can press keys with the result
def press_key(key, mod=()):
    d = display.Display()
    keycode = string_to_keycode(d, key)
    fake_input(d, X.KeyPress, keycode)
    d.sync()
    fake_input(d, X.KeyRelease, keycode)
    d.sync()
We can wrap this inside a function for typing an entire string.
char_to_key = defaultdict({" ": "space", ".": "period"})

def type_(s):
    for key in s:
        press_key(char_to_key.get(key, key))
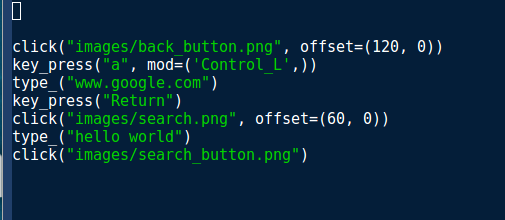
In Sikuli, we see images instead of filenames in our editor which makes it immediately clear where we are trying to move our mouse pointer to. But our implementation only shows filenames.
I happen to use Emacs which has an iimage minor mode. Enabling it with M-x iimage-mode gives the results
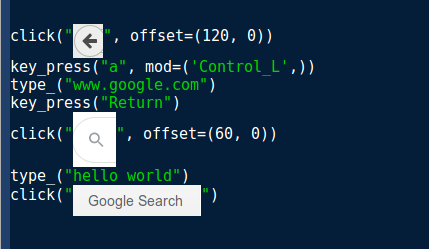
Note that this doesn't automatically reload images when the path to a new file is typed.
Unfortunately, this solution is Emacs specific and any solution here would be tied to a specific editor (either existing or new).
From the first screenshot in this post, we can see that Sikuli is actually an IDE and not a library and it does have quite a few features to make the entire process streamlined. However, my motivation was to just get a library that I can then customize.
The article which introduced Sikuli: "Sikuli: Using GUI screenshots for search and automation"